

Table of contents
Intro
Are you looking for a quick and easy way to start building your blogging platform? Look no further than React and Outerbase! React is a popular JavaScript library used for creating user interfaces, while Outerbase is a platform that allows developers to quickly create and manage websites. In this beginner's guide, we'll show you how to use React and Outerbase to create your own blogging platform in no time! From setting up the environment to deploying your project, we'll cover all the steps you need to take to get your blog up and running.
Inspiration
My motivation to embark on this project stems from a deep-seated desire I've harbored for quite some time – to develop a Blogging Platform. The Outerbase Hackathon presented a golden opportunity to bring this cherished vision to life. I am profoundly thankful to Hashnode and Outerbase for affording me this invaluable chance to transform my long-held aspiration into a tangible and meaningful project.
What problem does it solve?
The basic blogging platform addresses the need for individuals to easily publish and share their thoughts, ideas, and experiences online. It provides a user-friendly platform for content creators to write, publish, and organize their articles, making them accessible to a broader audience.
How did you build it?
In this project, I utilized tech stacks comprising Outerbase, React, Auth0 and react-router-dom. As a frontend developer, my prior experience primarily centered on frontend technologies, and I had limited knowledge of backend development. However, for the Hackathon, I needed to incorporate Outerbase into my project. Surprisingly, working with Outerbase turned out to be a relatively smooth experience. Their platform's features were impressively intuitive, making it accessible even for someone with a frontend background. While it's worth noting that, being in beta, Outerbase did have a few issues, my overall impression was positive, and I found it to be a valuable addition to my project.
Prerequisites
Account on GitHub
Node.js installed
Knowledge of React
Git Bash installed
VS Code installed or any other preferred code editor
Resources
Frontend Setup
React is a powerful JavaScript library that allows you to create dynamic and interactive user interfaces. With its component-based architecture and virtual DOM, React makes it easy to build reusable UI components and update them efficiently.
Go to BlogZen GitHub repository: https://github.com/Palakkgoyal/BlogZen
Fork the repo by clicking on the fork button

After forking, click on the green-colored Code button and copy the URL
Create a new folder in your device and open git bash in the folder
Run the following commands:
git clone url-of-repoChange the url-of-repo with the URL you copied
cd BlogZenOpen VS Code
In the terminal of VS Code run:
npm installThe above command will install all the required dependencies.
Your frontend setup is complete
Backend Setup
For the backend services, I am going to use Outerbase(An interface for your database). You can easily create plugins and integrations here. Plugins help you and your fellow mates visualize databases efficiently. As in this tutorial I am going to use integrations only, you can get a glimpse of plugins from these resources:
Outerbase's Commands/Integrations allow us to easily create a workflow of data and code in our favorite language whether it's TypeScript, JavaScript, or Python.
But today we are going to use Database queries for commands.
So, without any further delay let's get started 😄
Getting started with Outerbase
Go to outerbase.com
Create a new account on it by clicking on Sign Up in the top-right corner of the page

After signing up we will be asked to create a new workspace, fill up the details and click on Create workspace
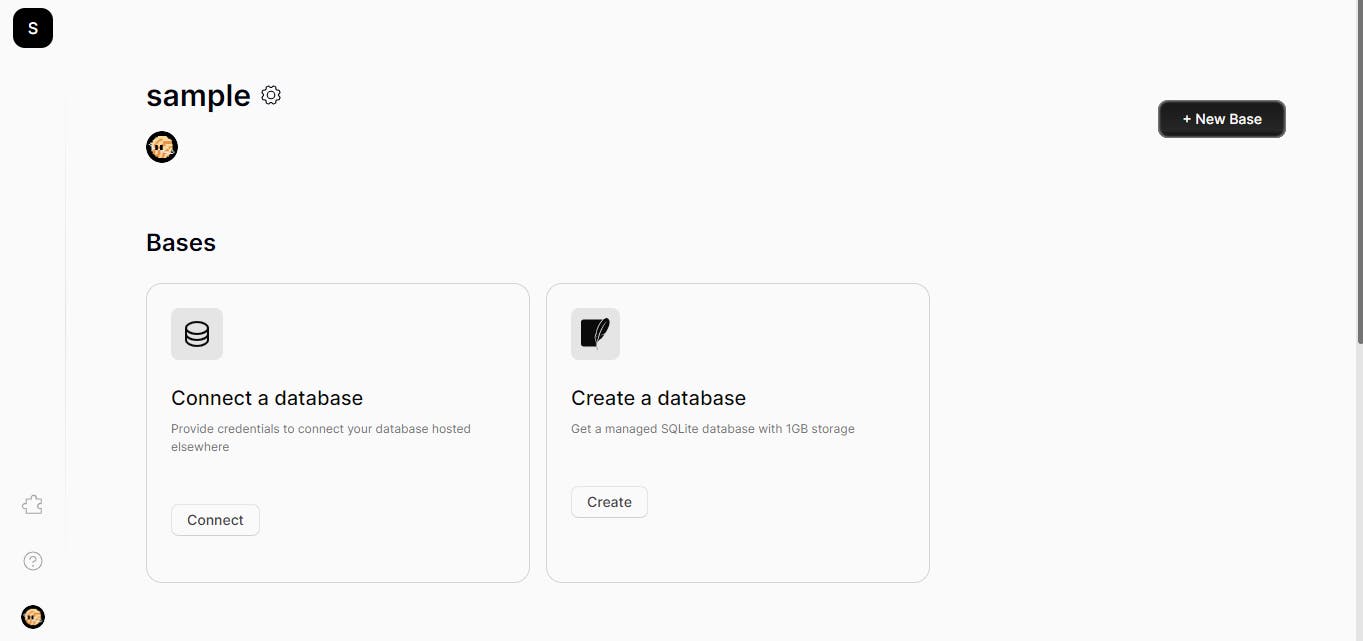
After creating the workspace we will get redirected to the same and there we will have two options whether to connect a database that is hosted elsewhere or create a new SQLite database on Outerbase, we will go with the second option (You can explore the first one as well, it's up to you)
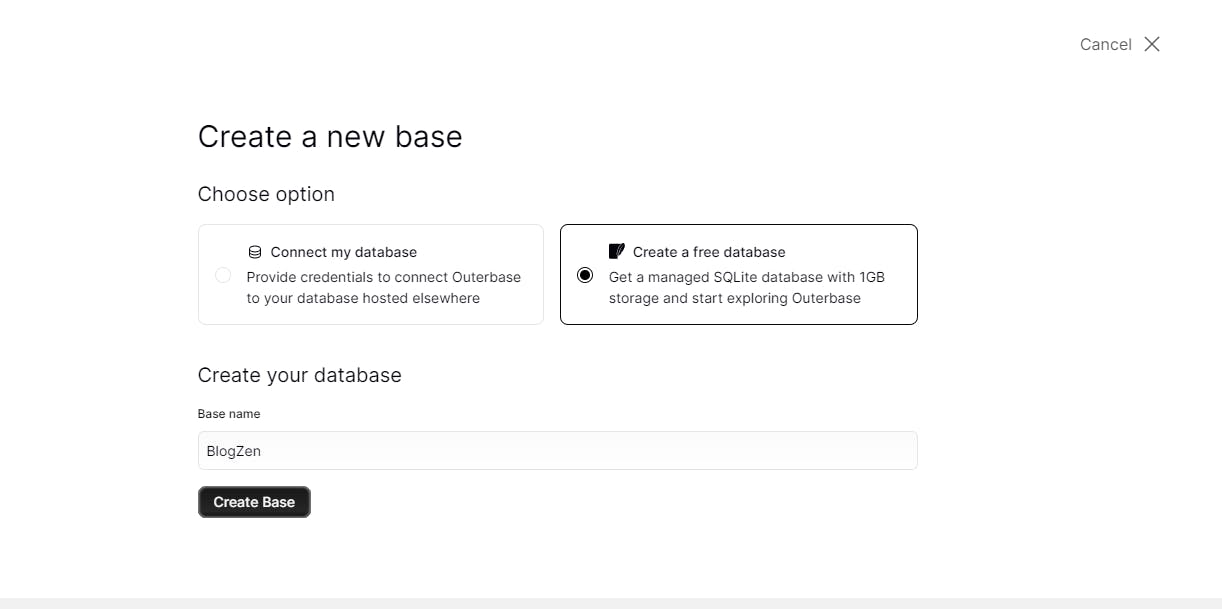
Click on Create a Database and then choose Create a free database, enter your database name and press Create Base
After creating a new database we will be redirected to the same.
First, we will begin by creating all the essential tables required for our Blogging Website.
List of tables:
blogPost
bookmarks
comments
users
drafts
Creating a table in Outerbase
Click on the New button and then click on Query to create a new table.

- 💡You can also create a table using the Table option above in the list but here we will create a table using Query.
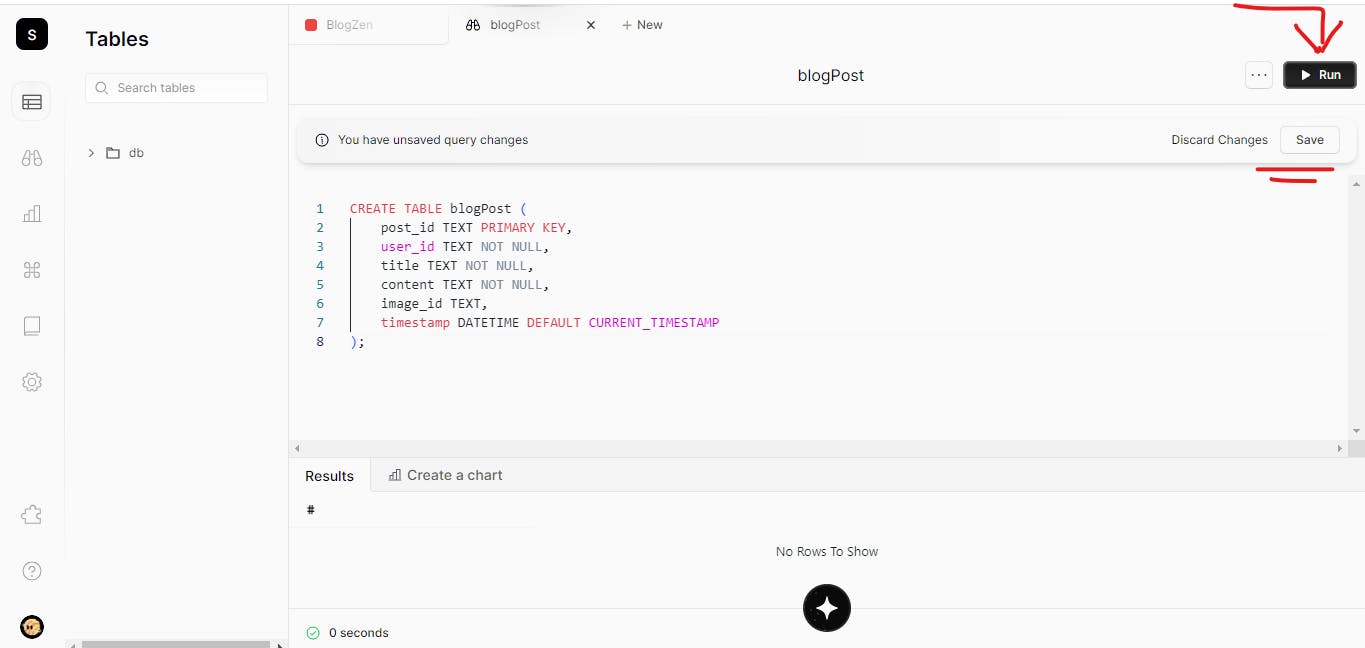
After clicking on Query you will be asked to write a SQLite query for creating a table. If you don't know SQLite then, don't sweat, Outerbase has an amazing feature to help you with that and that is EZQL.
EZQL is a powerful tool that allows you to formulate queries in natural language, and it seamlessly retrieves responses in SQLite. Furthermore, it boasts a range of remarkable capabilities, all of which can be explored in detail by visiting this link: docs.outerbase.com/docs/ezql/overview
Once you've composed your query, simply click the Save button, and once the query has been saved, proceed to click Run.
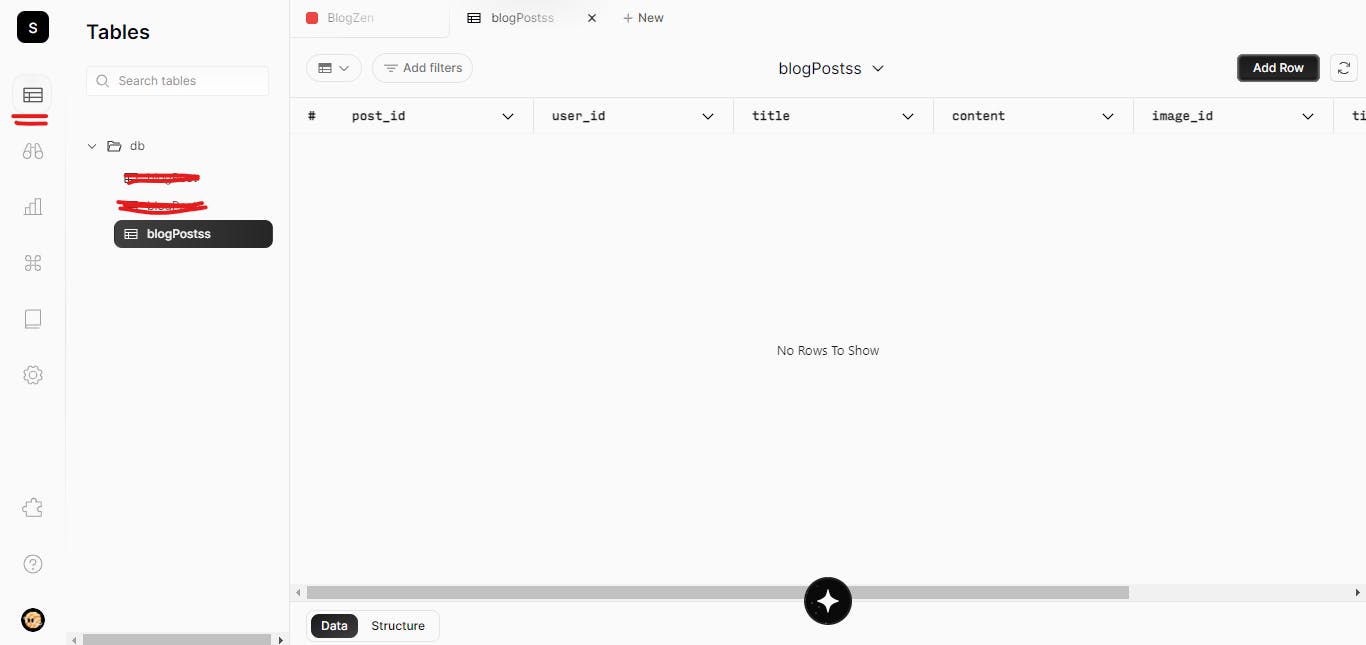
You might need to do a hard refresh or even open Outerbase in a new tab to see your created database in the tables(As Outerbase is in its beta version currently, things are subject to change)
If you've followed the tutorial, your database should be created by now. However, if you encounter any issues, don't hesitate to reach out and join the Outerbase community. The community is known for its strong support system, and both Braydon and Brandon, the founders, are enthusiastic about assisting members with their doubts and questions. https://discord.com/invite/8qyZuYM4GA
You can get your table from the sidebar menu
Now, for the other tables, I am providing you with the queries.
CREATE TABLE bookmarks (
    bookmark_id INTEGER PRIMARY KEY AUTOINCREMENT,
    email TEXT NOT NULL,
    post_id TEXT NOT NULL,
    timestamp TIMESTAMP Default CURRENT_TIMESTAMP
);
CREATE TABLE comments (
    comment_id INTEGER PRIMARY KEY AUTOINCREMENT,
    post_id TEXT NOT NULL,
    user_id TEXT NOT NULL,
    comment_text TEXT NOT NULL,
    timestamp TIMESTAMP DEFAULT CURRENT_TIMESTAMP
);
CREATE TABLE Users (
    user_id TEXT PRIMARY KEY,
    name TEXT NOT NULL,
    email TEXT NOT NULL UNIQUE,
    image TEXT,
    createdAt DATETIME DEFAULT CURRENT_TIMESTAMP
);
CREATE TABLE Drafts (
    post_id TEXT PRIMARY KEY,
    user_id TEXT NOT NULL,
    title TEXT NOT NULL,
    content TEXT NOT NULL,
    image_id TEXT,
    timestamp DATETIME DEFAULT CURRENT_TIMESTAMP
);
Creating Integrations Using Outerbase
Outerbase Commands provide a flexible way to simplify tasks in Outerbase. We can use the URL generated by these commands in our frontend to connect it with the backend
To create a command again click on New and this time click on Commands.

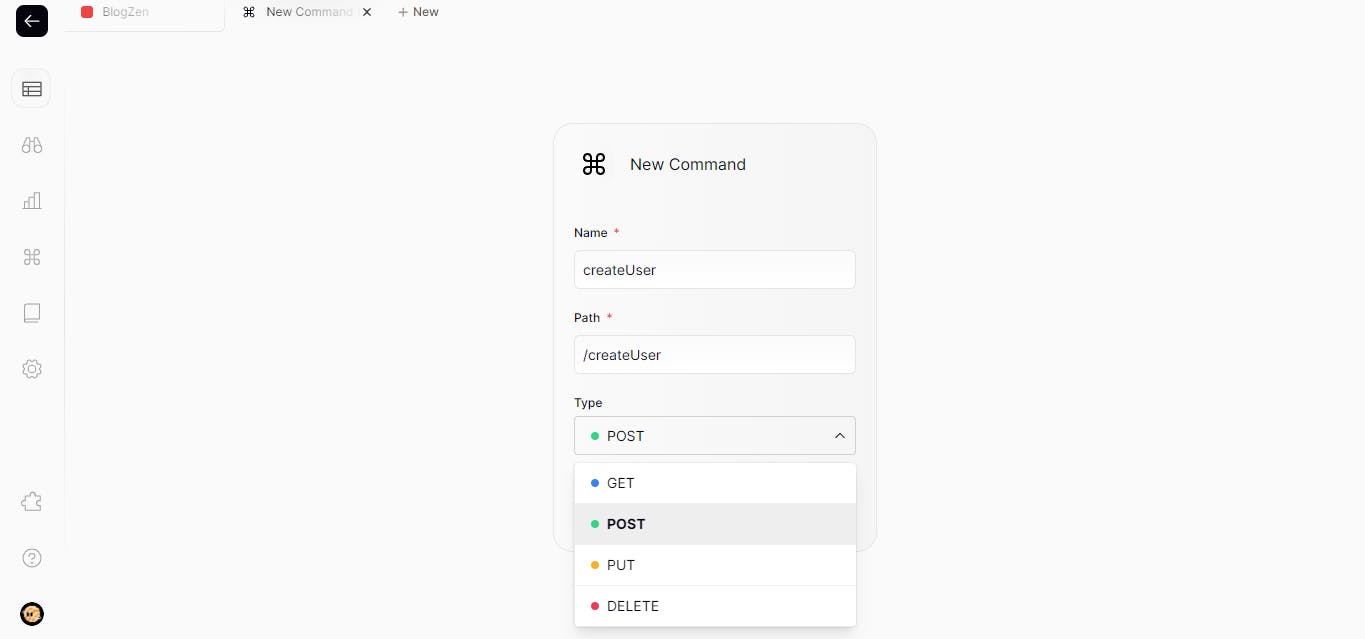
Enter your command name, path and method you want to use.
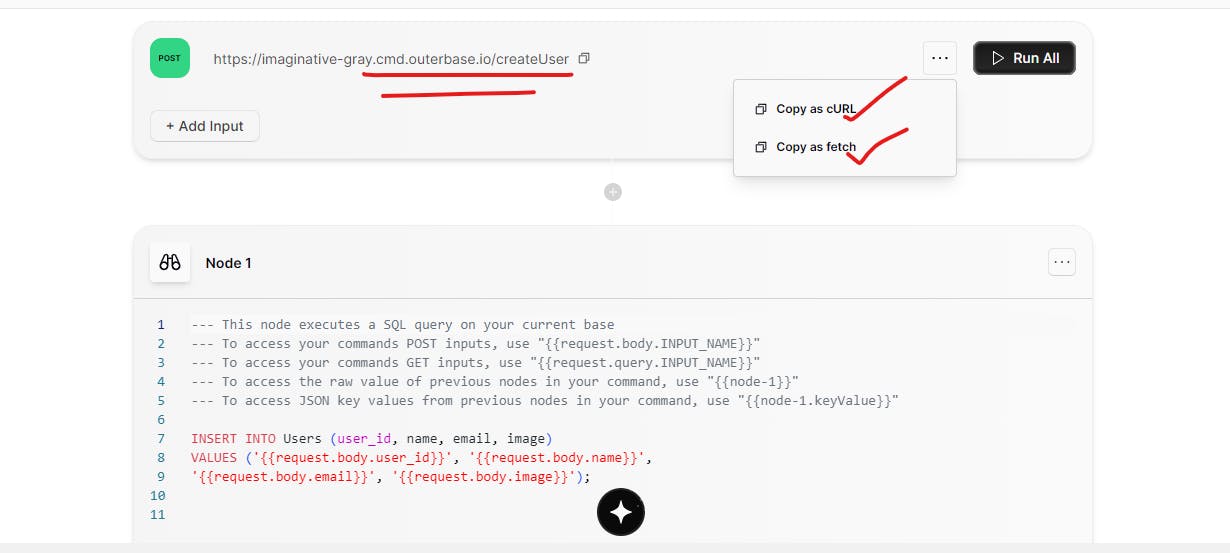
So, first, we will create a user in our database in Users tables hence, for that, we will use the post method. After filling up the details click on Create Command
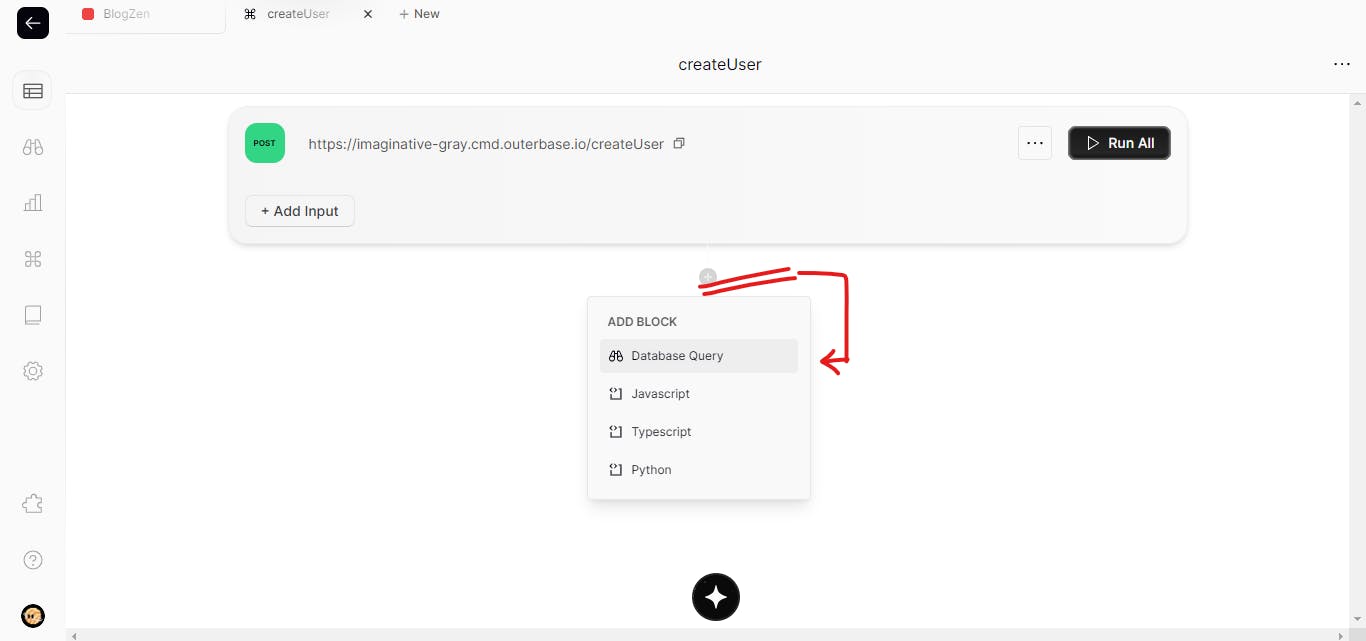
You will be redirected to the command so now, click on the + icon to write the command and it will give you a list of languages to choose from. Now, we will use Database Query
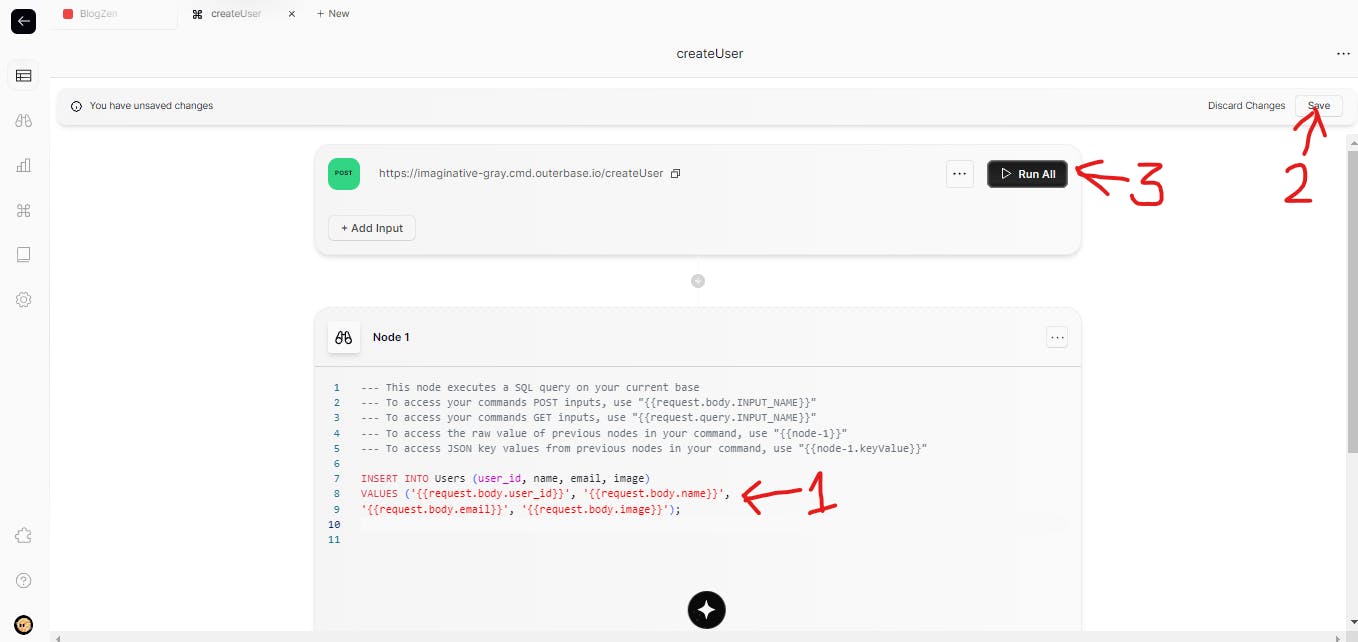
Write post command
Save it
Run it
After running copy the URL, you have three options whether to copy it as curl or fetch or as just URL and use it in your frontend
In the same way, you can write all the required commands
For a basic blog website, these are the essential commands we'll be using. Keep in mind that there are many more capabilities to explore, and you can easily delve into them if you have more complex requirements.

How to integrate with the frontend?
Example 1: I am giving you here the code to create a user from the frontend
export default async function createUser(user_id, name, email, image) {
    try {
        await fetch(`https://wasteful-brown.cmd.outerbase.io/createUser`, {
            method: "POST",
            headers: {
                "content-type": "application/json",
            },
            body: JSON.stringify({
                user_id: user_id,
                name: name,
                email: email,
                image: image,
            }),
        });
    } catch (error) {
       console.error("There was an error while logging in!", error)
    }
}

createUser("kksdj-sdkfV-23kd", "Palak Goyal", "000@gmail.com", "https://url-of-image")
The above method will create a user in our database.
Deploying the blogging platform to a live server using Netlify
Once you've built your blogging platform using React and Outerbase, the final step is to deploy it to a live server so that it's accessible to the world. One of the easiest and most popular options for deployment is Netlify.
Netlify is a hosting service that allows you to deploy and manage static websites and web applications with ease. With its simple setup and continuous deployment capabilities, you can have your blogging platform up and running in no time.
To deploy your platform to Netlify, you'll first need to create an account on the Netlify website. Once you're logged in, you can connect your Git repository (where your blogging platform code is stored) to Netlify. This will allow Netlify to automatically build and deploy your platform whenever you push new changes to your repository.
After connecting your repository, you can configure the deployment settings such as the build command, publish directory, and custom domain if you have one. Once everything is set up, Netlify will take care of building and deploying your platform whenever you push new changes to your repository.
Once the deployment is complete, you can access your live blogging platform through the URL provided by Netlify. Congratulations, your blogging platform is now live and ready to be shared with the world!
Wanna See Mine? here it is: https://blogzen-outerbase.netlify.app/
Project Video
Public Repo Link
GitHub: https://github.com/Palakkgoyal/BlogZen
If you have any queries, please let me know in the comment section. I will be happy to help you.
Thanks for reading :)